Saturday 26 November 2011

PRODUCTION: Skills Development Editing

The layout of Final Cut Pro. Its more technical compared to
other basic programs.
Editing on Final Cut Pro this year was completely different from the year before. Having done Media Studies in both years 10 and 11 using Mac editing programs, I had acquired enough editing knowledge to create a finished movie piece. I use to personally create and edit my own clips when I was younger, hence my good editing skills in media today. However, being introduced to Final Cut Pro in AS had helped my skills dramatically knowing I had every tool I needed to create a professional looking end product. Unlike other programs I had used in the past, Final Cut Pro allows the editor to do just about anything they want. Instead of having basic controls, Final Cut Pro has a phenomenal amount of features that I have otherwise not seen before. Being pretty experienced with editing beforehand, Final Cut Pro was in a whole other league compared to what I had used before due to its technical capabilities.

Last year at the end of our AS course, we were shown how music videos are filmed so they can be edited in a way which would sync up the lips with the lyrics. We were shown a demo of how lip syncing is done and what it requires. This tutorial showed us the basics of how edit a music video.

During the planning of our music video, we were told that we needed at least 4 base tracks to ensure we had enough footage to make the video. However, as we had recorded well over 20 base tracks, we had multiple shots which needed all to be prepared before editing could begin. We had to mark specific sections of every single base track so we can sync all the them together along with the music to allow us to easily edit. This was a new skill which us as a group had developed as marking the same sections of over 20 base tracks we had required a significant amount of time. It also required a great deal of precision to ensure that the lips and music were timed good enough to make it look like our artist Poppy was actually singing. The precision involved was the most time consuming bit of the editing as an error in timing can complicate the whole editing process.

The approximately 23 base tracks we had filmed all had to be placed onto separate columns on the timeline. When each base track was placed onto its separate column, they all had to be dragged individually to match the markers we placed on the music so the lips sync the artist. All that was required of us now was to delete the clips that we didn't want allowing the other clip in the column below to appear on screen. Before the tutorial we had at the end of AS, I initially thought that all the clips were recorded and placed onto one column on the timeline. Even during the tutorial sessions, I tried to lip sync a music video using my own technique and soon discovered why the technique we had been taught in class is better and much more easier. I feel that I have learned and adapted to a new editing technique used for editing a music video together. As you can see in the image below, the number of base tracked we had below had all been marked up to be in sync with the music. Having cut every base track where there are markers, we then began deleting the clips in which we didn't want in the music video.
Marking each base track required a level of patience and precision. Once each one had been marked up, we just had to align each every base track to the markers of the music.
Another skill I had learned during the editing of our music video was the colour alterations we can make to each individual clip. This would allow us to change the colour of a clip if we felt the original shot was not to the standards we had wanted. We had used colour correction in our music video as we thought some shots seemed to be too dark and too vividly coloured. The colour correction pane allows the editor to change every aspect of the shot in terms of colour. It allows you to alter the hue, saturation, contrast, blacks, midtones and whites to get the desired colour we wanted. As we were aiming to create a professional looking music video, we didn't want to tamper with the colours too much as the finished product may like amateur and silly. This is why we had only used it to brighten up a few dimmed shots and tone down bright colours which we thought were too vivid. 
This is the colour correction pane which allowed us to change certain aspects of a clip's colour and appearance.
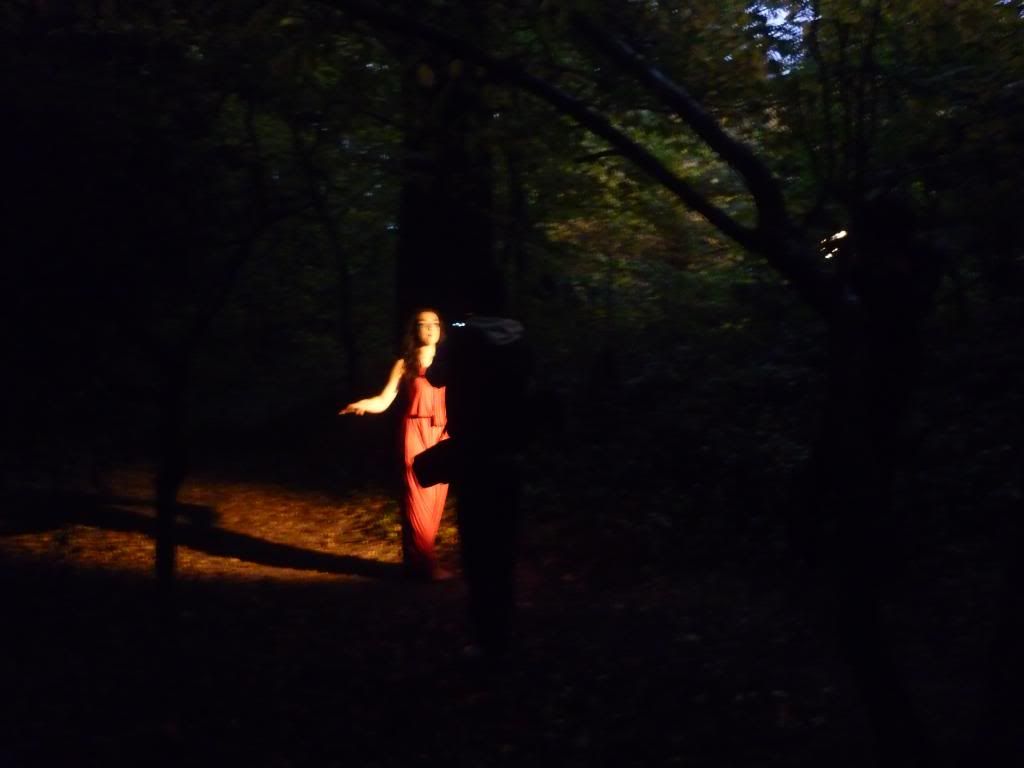
Before colour correction.
Poppy is hard to see on screen as the lighting is not bright enough to see her clearly.
Above is an image of Poppy in complete darkness with a strobe light flashing on her. Initially, even though the flashing strobe light we used was very bright, the camera wasn't able to pick this up very well. This is why here on this shot, we used colour correction to brighten up the image and make Poppy more visible on screen.
After colour correction.
As you can see, Poppy is much more visible on screen and clearer to see.
We had messed around with a few animated effects, but thought that it was unnecessary and didn't suit the type of edit we were putting together.
We experimented with a few effects but they seemed
unrelated to what we were doing.
Having worked with text and titles in our AS thriller films, we already knew how to implement this into our music video. As our music video contained flashing images, we had inserted a title at the beginning of the music video to warn people who may suffer with epilepsy.
Message placed in our music video using another program, Livetype. 
All in all, I feel I have learnt much more skills in editing than compared to last year. This is because as time has gone by, I have become much more comfortable with the layout Final Cut Pro, the vast features it has to offer and generally how it works. If I want to cut a clip, I can easily do so as I have become more suited to the program. If I want to add in an effect, I know how to navigate around to find what I'm looking for and implement it into our music video. One year ago, if I had been told to edit a music video and sync up all the words using various shots, I would not know where to begin. Now, I feel I have learnt the skills and knowledge to create a music video of good quality without struggle.

PRODUCTION: Skills Development AS to A2

I feel the way we approached and planned our music video compared to our AS thrillers was quite different. This was because all the factors that would have mattered last year, are exempt this year and vice versa. For example, in AS, we had to focus on continuity, something which was completely ignored in our music video production. We had to take a lot consideration of how we were going to match up each shot and the emotions we wanted to convey when we planned our storyboard in AS. In A2, it was much easier. We have all been subject to music videos while growing up, and over the years, I have realised that anything can be shown on screen; what is shown on screen is and often isn't related to the music or the lyrics. This is where Andrew Goodwin's theory of illustration, amplification and disjuncture comes into play. The music video can completely match what the song is saying, present new ideas that the song doesn't, or just completely have nothing to do with the music. The fact that we could be so broad with our ideas and have no limits while planning our music video allowed us to do anything. This was something we couldn't do in AS as a thriller is a film, in which a story is told and shown on screen. In a music video, the song itself tells the story and the video just shows their perception, ideas or feelings of the song.

In AS, planning had to be direct and relate in every aspect to what we were trying to convey to the audience. From the setting, costume, lighting, sounds and camera angles, everything had to be taken into account when planning. As thrillers do not directly relate to our age group, last year we had to learn what is taken into account when creating a thriller, whereas with music videos, we all know what they consist of. With thrillers, some people hate the genre whereas some people may like it. This meant that idea wise, not everyone last year was capable of presenting feasible ideas that would work well when planning. Thrillers is a genre of films that some people may enjoy and others would not enjoy so much. Personally, I'm not a great fan of thrillers as I feel in the film industry, they are all too similar and predictable. With music, everyone has their own varied tastes in genres and could find a song suited to them. It allowed us to work with what genre we personally liked which meant we had much more detailed and better ideas than in AS.

Also, what made this years planning much different was the way that as we group, we communicated much more than my group did last year. For instance, last year, the only time we managed to present ideas to each about our work was in lesson when we all met up as a group. This year, the fact that everyone in our group had smart phones meant that we could all contact and present ideas to each other through various applications available. Facebook played a big role in as we were constantly able to keep on contact. Poppy suggested an idea to create a private Facebook group in which only me, Poppy, Nick and Charon could access. As we all had smart phones, we could all access this nearly any where at any time. Below is an example of how it looked on my Blackberry Bold.
On my phone, I was able to access our Facebook group and view any comments or information I, Nick, Charon or Poppy  may have posted.

I could see the latest comments, images or videos posted to keep me upto date with the groups ideas.
As Charon, Nick and Poppy also had smart phones, they too could do the same. The fact that we could communicate much more easily compared to last year made planning simple and efficient.

Facebook group on a PC.
The fact that only Nick, Charon, Poppy and I are members of the group allowed us to freely express our ideas.
As we all had access to this, we could all constantly present ideas and update each other with information if one of us were ill or unaware of something.

PRODUCTION: Projector inspiration

From the moment we chose our song, Poppy had insisted that we use a few projection shots in our video like the professional artist below. This was because she had been inspired by a few music videos such as Imogen Heap's music video, Lifeline, which shows the artist have images projected onto her. This would allow us to create effects not otherwise possible unless we had professional special effects software. The effect looks unique and are incomparable to other types of effects.

Imogen Heap with an image projected onto her to give her that "blue skinned" look.
We all agreed as a group that doing this is something different and unique to our music video. Below is an picture of Poppy with an image projected onto her face mimicking the above professional artist. I feel the effect in the image below is great especially as the projected image is on Poppy's face only and not on the background (just like in Imogen Heap's video).


Poppy with glowing moving lines floating across her head. I feel its a great effect. 
Anything can be shown and projected onto the artist. Imogen Heap is doing just that.

Here, we took our own initiative to scribble random lines across Poppy's face to yet again mimic Imogen Heap's music video, Lifeline. Instead of projecting a video, I came up with the idea to go on Paint then create and project our own images on to the artist so we have control of what is being shown. This was a decision the group took liking to, and so therefore created our own style of projecting images.

Here is the video which had inspired us to implement this idea into our own music video:
Imogen Heap - Lifeline

Friday 25 November 2011

PRODUCTION: Editing 3

Part 3 of the editing is where things begun to take shape which allowed us to focus on other things. As college was closed on Tuesday, the day we had media as a group to edit, Nick gladly in his spare time decided to continue editing the next day. The fact that the majority of clips we wanted to use had already been chosen, synced with the music and generally worked well at this early stage of editing gave us an advantage. It meant that we had less pressure off our shoulders to rush with the editing and had extra time to fiddle with the full features Final Cut Pro had to offer. Instead of just focusing on selecting shots we want in the video, the edit was developed enough to spend time on individual shots e.g. adjusting playback speed etc... An example was the shot of Poppy running through the woods; initially this shot was about 4 seconds long at normal playback speed. However, once Nick had done his magic adjusting the playback speed of that shot, Poppy in that clip was now running in slow motion.

We also had time look back at other shots and experiment where it can be cut so it can switch back and forth between clips. Below is an example.
             Shot 1                                   Shot 2                                Shot 1 (again)

Feedback from the above shots was generally positive among people as they felt it added something different to the video and fit in perfectly with the lyrics and tempo of the song at that stage.

While Poppy was ill, me, Charon and Nick continued to see edit while constantly thinking what can be done to better the video. Being a perfectionist, I kept on highlighting the fact that some shots in the video were a bit to dark in contrast with other shots. This was when Nick had an idea of changing the colour of some shots to brighten it up and make it look more pleasing on the eye. Below is a video of Nick doing just that to one clip I kept on nagging the group about how dark it is in contrast to other shots.


The reason this clip was as it was is because all of our shots (except the projection shots) were filmed in one day. This meant that some shots were recorded in the afternoon in bright sunlight, whereas other shots were recorded in the evening when it got much darker. The camera struggled under dark light conditions hence why we brightened the shot up on Final Cut Pro. To change the brightness, Nick altered the hue and saturation of some shots to make it more pleasing on the eye, easier to see and more natural.


This editing session was so productive that we even decided to tinker with some effects in our video. There were some effects like the one below which we thought were too extreme to put in to the final product. This was because it didn't really match the mise en scene of the song and emotions portrayed and it also looked unprofessional.

We did however sick with one effect in the video. This was one that we messed around with and decided that it actually worked within the video. We added a slight glow to the clip which is enabled on the word "Howl" in the song. This glow we feel just adds extra meaning to the song and is something different among our classmates music videos. You cannot really see the glow in the images below, but in the video it is noticeable. The effect isn't too complicated nor too shallow; it is rather subtle.

A before shot of Poppy with no effect. 
An after shot of where the effect is queued just as the songs
says "Howl." Notice it is slightly blurred and not as crisp
as the above shot.

PRODUCTION: Editing 2

Part two of the editing involved much more intricate fine cuts than when we first began. This was because at first, clips were just thrown onto the timeline to see what shots work with what, how it works according to the music and generally to see what clips are useful that we can work with. After deciding on what shots we wanted, we continued to experiment with certain clips while still making sure the shots fit within the music, match with the following shot and is in sync with the lyrics.

Editing involves spontaneous decisions of which some work as brilliant ideas, and some fail. This is what we tried to do as spontaneous decisions can bring about work which looks great and that we never would have initially thought of. Although keeping to the storyboard we created for the music video, experimenting with various shots is what is needed to give our music video an edge.

As Nick had done a vast amount of work, Poppy and I began editing as well as choosing the clips to implement in the video. Poppy had already created a good base of which she deleted unnecessary shots on the timeline and left shots which fit within our storyboard. Below is a video showing me and Poppy discussing the shots with some useful input from Charon on how things are going.


We were fine tuning shots on the timeline along with following shots to just get a general taking on what we definitely want to keep and what we felt didn't work at all. As we had approximately 23 base tracks, choosing between each track was hard and required opinions from everybody. The girls talk about how our opinions may conflict but also what it can bring to the group and the final product.


While we worked on our video, did continuously asked people in the class or anyone in general to watch what we had done so far, what they liked/disliked and how it could be improved. This tactic while editing really helped us as it gave us boundaries on what people like to see and what negative thoughts people had on the edit so far. The constructive criticism we got allowed us to change things instantly and make sure we done things right the first time around and not near the finishing of our video.

PRODUCTION: Editing 1

The Monday back from half term at 9am sharp, me, Nick and Poppy returned the camera equipment back to college as asked. Not having lessons till 3:15 we three gathered around a Mac and uploaded our shots to our groups hard drive. We then imported it into Final Cut Pro, the editing program we are using and began sorting through the many clips we had recorded in such a short amount of time. After categorising our clips so it would be easy to find certain shots, Poppy placed all the base tracks we had onto the timeline and began marking points on every single base track so they can be synchronised together. We had learnt how to do this near the end of our AS year through tutorials shown in class. This involved marking certain aspects of each base track (e.g. a specific word at a specific time) on every base track so they can be matched up together and easily edited. Instead of just putting markers only on the lyrics or specific words of the song, we had also put markers on the beat of music as we felt this would make it easier for us to edit.

As I had gone home to focus on other work commitments due in that day, both Nick and Poppy began to look at the footage and develop ideas in how to edit it. During planning, it had been discussed that we would like a jump cut of Poppy appearing at various distances and jumping from tree to tree. Poppy and Nick decided to test the idea of this jump cut to see how it would look. The shot was recorded as one whole clip on a tripod to keep the position of the camera consistent as the jump cut shows her appear from one tree to another. This allowed us during editing to delete the sections of her behind certain trees and select clips we did want, merging them together making it look like one continuous shot. This was just a rough draft of the idea to see how it works on screen, and thankfully, it worked well enough for us to be more intricate with our editing.

After mashing a few shots together that we though would go well together, we began to get an image of what our music video may actually look like, as seen in the video below.

PRODUCTION: Sparkler inspiration and outcome

While researching for our music video, Charon and Poppy got an idea to use sparklers in our music video a few days before we began recording. Below is an image representing the idea Poppy and Charon wanted to implement into the music video. This involved using a sparkler to spell out words through the movements of the sparkle. Although we are not equipped to produce a final shot like the one below, we just wanted to try the idea, see what can be done with it on camera and how it'll look.


Although initially it wasn't part of the original plans, we did implement this idea into our music video. It didn't however look as good as we had hoped when we had used it as the lighting and camera angles we used didn't bring out the best of what we could have done with it. We did record a few shots with Poppy using the sparkler, however, as an audience it is difficult to see what Poppy was spelling out when we reviewed the clips. The light emitted from the sparkle though did give us an opportunity to get a close up shot of Poppy with only the sparkler and her head in shot.

PRODUCTION: Filming Day 2

On Thursday 28th October, we began and finished our second day of filming for our music video, Howl by Florence and the Machine. Throughout the day, we had recorded approximately 26 base tracks all of which are at least 3 minutes 40 seconds long. The day started from 12pm and we finished recording well into the night beyond 9pm. Throughout this time, we were continually recording base track after base track to make sure when it came to editing, we had the shots we wanted and had a wide variety to choose from. Also, if we recorded a base track and thought it didn't fit into the music video well, we could easily substitute it with other shots we had. The day was tough, but we were glad we got all the the important tracks we needed within one day.


We began by meeting up at college by mid-day so from there, together we could all travel to the location we want to film in. We first all went straight to Poppy's house in North London to organise ourselves, decide what shots we're doing, how we're going to do it and then prepare for it (e.g. costume and makeup).


Once Poppy got ready with makeup and costume, we hit the first location; Queens Wood Park which was a short walk away from Poppy's house. This is where our day really begun.

P1030945.jpg

This was the first shot we recorded of the day. As you can see by what I am wearing, the weather was quite chilly (hence the wooly hat), but that didn't phase Poppy and she gladly got straight into character to record the first shot. In most of the shots we recorded in the day, we tried not to use the tripod often as through research we found out that most music videos are recorded free-hand, which is much more effective than a static shot. This base track we felt would look horrible if a tripod was used as it would look boring, static and hardly creative.

We used a wide variety of shot angles from high angle close ups to wide distant shots. This was done as we as a group wanted as many different shots as possible so we could have a wide variety of shots to choose from during editing.


P1030987.jpg
The one issue we had with free-hand recording is that as the song is nearly 4 minutes long, holding the camera out for that length of time constantly throughout the day without trying to shake the camera was difficult. On the right is an example of the difficulty we had holding the camera at certain angles for the whole during of the song. We had the tripod ready if holding the camera at that angle became difficult for Charon and/or if the shot didn't turn out to be as we expected.


Before we knew it, it had already become dark and after a quick costume and makeup change, we began recording our night shots as planned. This meant we had to use the spot-lights given to us by the college as without it, it was merely impossible to see even a few centermeters in front of you. We did use our phone camera lights to light up the area if we were moving around but we used the spot-lights when filming as it gave a great golden glow on camera. One of the best shots I feel we recorded on the day was while we were in the woods in the dark. Poppy was in a tree while me and Charon continually circled the tree to record the base track. Charon was holding the spot-light on Poppy while I was recording the shot and this was done as we constantly walked around the tree in pitch darkness. As the only source of light was on Poppy, me and Charon were unable see where we were walking and constantly kept on tripping over rocks and equipment in the way. However, Poppy kept composed, didn't laugh and we were able to get a 360 degree shot which was the most unique shot we recorded.


As we had recorded all the woodland shots we needed, we used the spare time we had left to record a few shots in Poppy's living room with a few fairy lights on her against a black wall. These shots offered something different to what we already had as the lighting from the fairy lights along with the makeup made Poppy glow on camera. These shots showed more of her innocent beauty which was more suited to the song rather than portray her than anything not related. We got close up base tracks of her lip singing, medium shots of her head and body and wide shots to get her entire person in shot. We used high angle shots as well as tracking low angle and static eye level shots.

Thursday 24 November 2011

Production - My favourite shots!

Here are a few of the shots I absolutely love in our video!

This shot is used in the chorus with the strobe lighting. We shone a red light on Poppy while she sang the chorus. I think it works so well because it's really different and the red makes the words in the chorus stand out.

Unfortunately I wasn't here when this shot was filmed, which is probably the reason I like it so much! It was a surprise to me and I love the way Poppy looks quite dark and the yellow trail of light is running through her eyes. It supports the disjuncture in our video, as it's quite random but looks amazing!

I really love this shot because the colouring has been changed which makes it look pale and colourless. We also slowed this shot down, whereby Poppy sang extra fast so that when we slowed the shot down he singing is in sync and the swing is moving very slowly. It looks really daunting and good.

This shot is briefly used at the end of the video, in the quick cutting to show the climax of the song. I think it looks so good because the colour really makes it stand out, and the artist looks unrealistic and bright.

Final Edit- My favorite clips.

A

B
(Image A&B) One of my favorite shots are a simple 3 second shot with the artist looking into the camera, even though its such a simple shot, I like the fact that its simplicity makes it such a lovely shot.
C

D
I also liked the shot of the artists jump cuts from tree to tree, making it looking almost supernatural as she appears from what looks like no where. (images C,D&E.)


E


F
Surprisingly, this was first my least favorite shot but as we put the effects on and edited it to fit into places that suited our liking, and nicks pickiness!!- I really do like these shots. (Image F)


G
Without a doubt, the slow motion running shot is my favorite shot out of all of them. It was one of my first shots that I had hoped to do and it came out twice as good as I'd expected. (Image G & H)

H 

I

The looking down shot is another one of my favorites. Its a very well lit shot, even though it was filmed in pure darkness in the middle fo queens woods. 

J

K
This shot is only shown twice but it suits the setting perfectly as well as gives the audience a nice view of the trees and what beautiful patterns it makes. 

L
This sparkler scene, is shown in small and short moments but the shortness of these clips are possible the reason how it is so effective as they are only shown at the end which give the audience a liking to the brand new images.

Digi pack thoughts..

Since that we cannot take screen shots of our music video due to it not being a clear enough image, we plan to shoot a real photo shoot for the digi pack. As the images that we have don't connect well enough to the music video. Having the shots in the music video, being dark and mysterious were as the images that Diana Evans Baker took, are bright and happy.


And so I will discuss the matters of the digi pack once we are all together on friday to talk about what is going to happen via digi pack plan.

Production - Editing Colour Correction


Here is a short video that shows Nick (who was very committed!) changing the colour on this shot. He is brightening it as the shot is a little dark, this will look great if it's brightened to look clear and not too much, which will make it look good on the big screen in the cinema. Go Nick!

Production - Editing Shot Changes

In the last week of editing is where we decided which shots needed editing and which didn't. We didn't want to over edit our video as there is quite a lot going on, but we felt some of our shots could look even better with effects on them. We used the colour tool on Final Cut pro to create the brightening and darker effects.


For our woodland shots we changed the colour of the shot to make it a paler colder colour. I think they look much better edited and adds to a theme of coldness and warning in the lyrics. 


The fairy light shot and outdoor woodland shot in the night (strobe) has been brightened a little. Both shots look a lot clearer, especially the strobe, it is easier to make out our artist and she can be seen more clearly. This will look much better on the big screen and will not appear so dark! The fairy light shot, brightened looks better because Poppy looks very pale and daunting. It really works well with her white glittery makeup, and the black dress. This makes her stand out a lot more and look really icey and cool!


This was the only shot we used different type of editing on. On Final Cut Pro we went of Effects > Video Filters > Glow to create this effect. We didn't use it numerous times as we thought it would look really pointless and too much, but it works well with the shot as Poppys movement and singing the chorus 'Howl' really makes it stand out!